
There is a feature that both iOS and Android offer that it is important that you have configured, it is the contacts in case of emergency. A function that would be ideal to never have to use, but if you need it, it could be of great help and even vital. So let's see how to configure it.
Emergency contacts, how to set them up and use them
Years ago, in what we now know as dumbphone, a contact with the AA name on used to assign the number of the person to call in an emergency. By sorting as the first in the contact list, we all knew that it was that number who had to be notified if something happened.
In this way, if by any chance you had to rescue or help a person, just picking up their phone and looking for that contact was enough. Now, having that contact in the agenda is useless. Because current smartphones are not unlocked if you do not enter the pin or pattern, or use the fingerprint or face.
To provide a solution, operating systems such as iOS and Android have implemented a function that is accessible by anyone, even by ourselves if we find ourselves caught in a complicated situation.
So, let's see how it is configured and how it is used if necessary.
How to Add or Remove Emergency Contacts on iOS
If you have an iOS device, adding or removing emergency contacts is very simple. You just have to do the following:
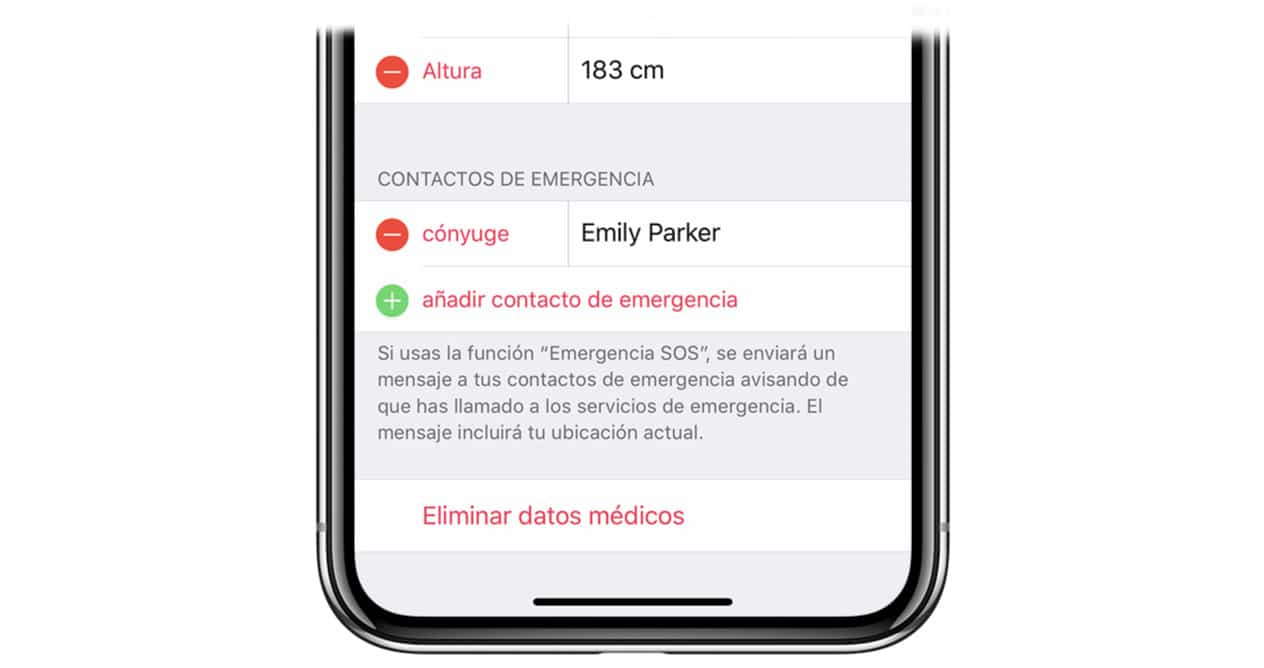
- Open the Health app.
- Go to the Medical data tab and tap on the edit option.
- In Emergency Contacts you can add or remove those you want.
- Once everything is correct, click OK to confirm.
How to add or remove emergency contacts on Android
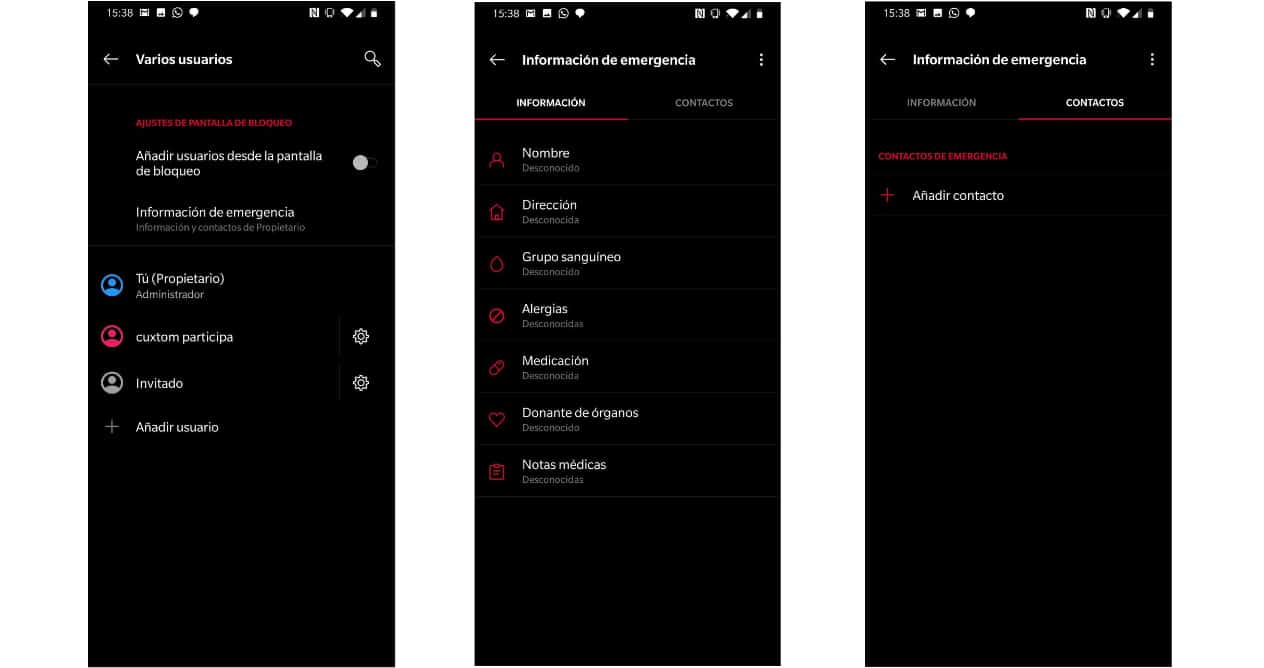
On Android devices, everything depends a bit on the Android version and whether it is a customization layer or another. Therefore, the easiest is to go to Settings and enter the word Emergency in the search engine. That will take you to the exact setting to enter the necessary data.
For example, in pure Android you will have to go to Settings> Phone information> Emergency information. In other versions such as the one used by OnePlus terminals, it is in Settings> System> Various users> Emergency information.
In all of them, once you access said settings, the procedure for adding contacts and information related to you in the event of an emergency is the same.
How to use emergency calls on iOS and Android
Seen how to add all the information related to the contact in case of emergency, let's see how to use this function. Let's start with iOS devices first.
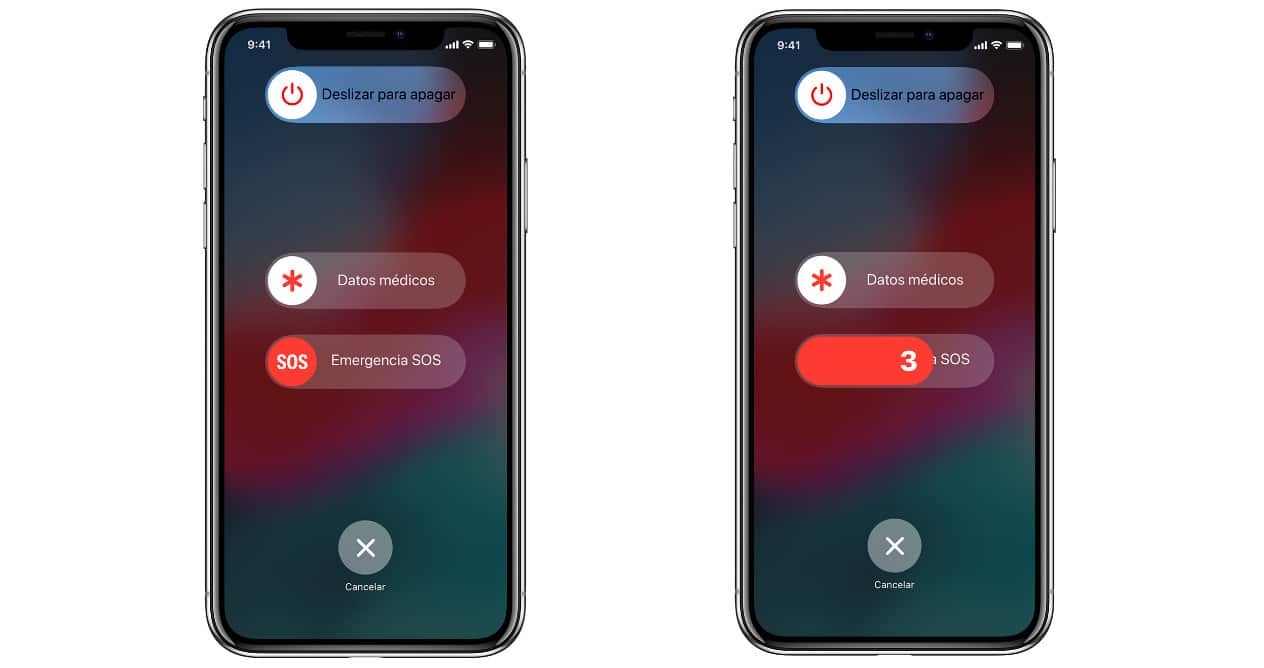
If you have an iPhone 8 or higher you will have to do the following. Press and hold the side power button and one of the volume buttons until a screen appears where you will see an Emergency slider.
Now swipe to make the call to the emergency services. If instead of sliding you keep pressing the previous combination, a countdown will begin and the call will be made automatically.
If you have an iPhone 7 or lower, the procedure varies slightly. Instead of holding down you will have to quickly press the side or top button (power button) five times. Once done, a screen will also appear with a slider for Emergencies.
As data, if the location is not active it will be activated temporarily to also send your location data to your contacts and emergency services.
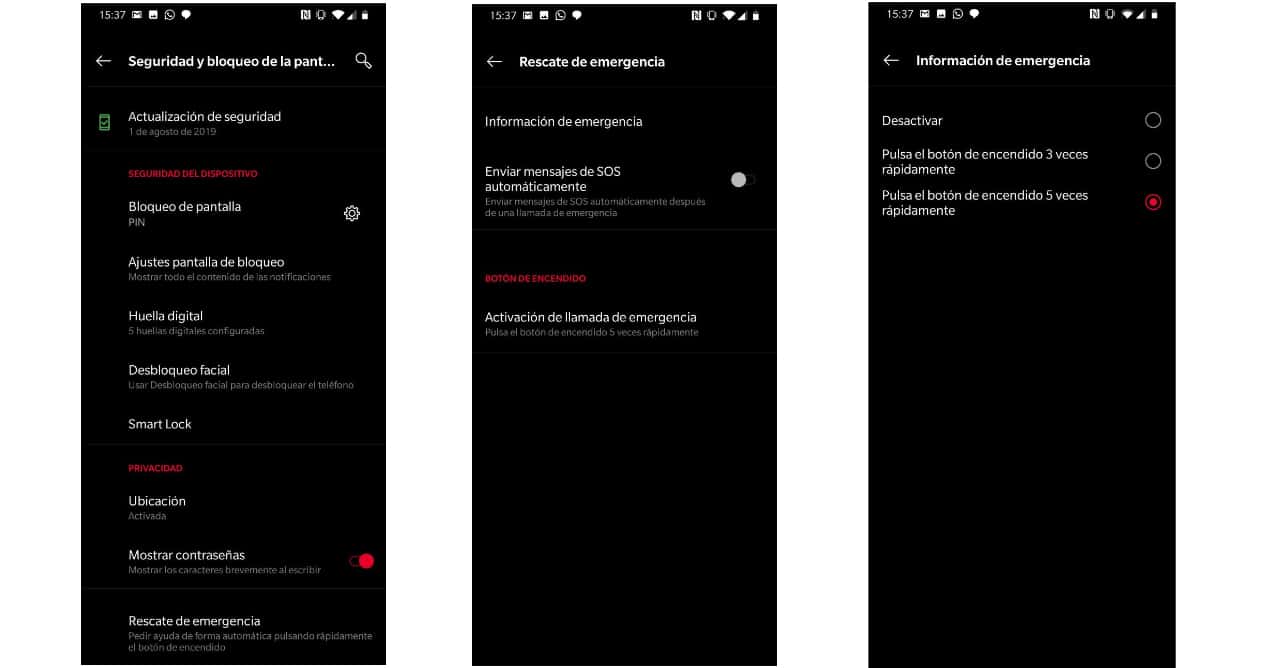
Now let's see how to do the same, call emergencies from Android devices. As before, depending on the layer of the system that is being used, the way to activate it will change or not. Normally it is activated by repeatedly pressing the power button or an icon will appear on the lock screen to call.
If from Settings you search for Emergencies again, you can set the parameters in the way you decide so that they can or can notify emergencies if necessary.
Finally, devices such as the Apple Watch and other smart watches also allow you to notify emergencies. It is important and recommended that you invest a few minutes to configure everything correctly. As we said at the beginning, this is one of those functions that we never want to use, but it can be what marks the outcome if we need help.